Are you ready to add trees and shrubs to your landscape? You don’t need to hire professionals to do the planting when you learn the basics of doing it the right way yourself.
Soil Preparation
How quickly and how well trees become established once they are planted is affected by the amount of stress they are exposed to before and during planting. Minimizing planting stress is the goal of proper planting. Trees and shrubs should also be thoroughly watered prior to planting to minimize water stress.
Ideally, soil preparation should be carried out well ahead of planting. Preparation could include incorporating organic matter into the soil to improve aeration, assist drainage of compacted soils and improve soil nutrient-holding capacity. Specific preparation may be needed if the soil has an inappropriate pH or is lacking in certain elements. Trees and shrubs with a limited soil tolerance range may require very specific soil preparation to meet their requirements.
Additional soil preparation is essential when you are ready to plant trees and shrubs. Dig the planting hole 50 percent wider but only as deep as the root ball. Prepare soil by mixing one-third existing soil, one-third organic matter and one-third topsoil.
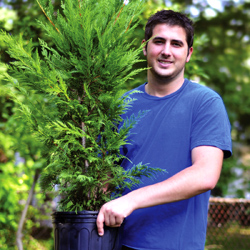
Planting Container-Grown Trees & Shrubs
When you buy a plant from a garden center or nursery, it often comes in a small pot that holds the roots. Remove the plant from that container gently, but without pulling on delicate stems or foliage. Squeezing the container all around can help loosen the root ball so it slides out more easily, or the container may be thin enough to cut away.
Because the plant was grown in a container, its roots have been restricted by the shape of the container. Loosen the roots all the way around, even on the bottom. If the root system is too tight to loosen with your fingers, cut through roots slightly with a knife or pruning sheers. Make three or four one-inch deep cuts, then gently pull the roots apart.
Center the plant in the prepared hole, keeping it 1-3 inches above grade. Keep roots spread out.
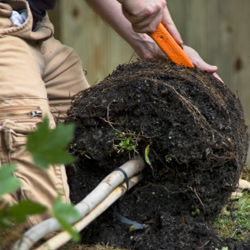
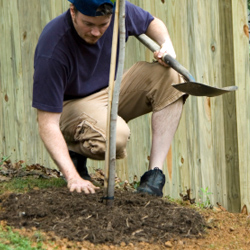
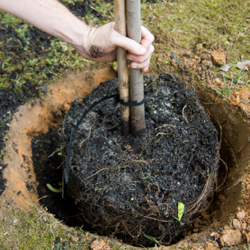
Planting Field-Grown Trees & Shrubs
If you are transplanting a tree or shrub that has been field grown, it may have bare roots or be lightly bagged or burlapped. Center the plant in the prepared hole 1-3 inches above the grade. Cut and remove all cords or twine from the root ball and trunk. Burlap should be left on, but loosened and pulled away from the trunk and below the soil surface. Remember to move trees carefully. Roll the root ball on its side and “steer” it into the hole with the trunk. Straighten the tree upright in the hole, checking it from different angles to be sure it is fully upright.
Completing the Planting
For both container-grown and balled and burlapped plant material, backfill the planting hole with soil your mix and pack firmly. Make a rim of soil around the plant to act as a “saucer” for holding water.
Water thoroughly with a slow soaking, and use a root stimulator fertilizer to provide good initial stimulus for the roots to spread out.
Apply a 2-inch layer of mulch around your new planting, keeping an open space of 3 inches around the trunk or base of the plant to allow for air circulation.
Staking Container & Field Grown Trees and Shrubs
When larger trees or shrubs are planted, they are not yet firmly established in their new locations and may tip or lean as the soil settles. For larger trees, use three wires secured to anchor stakes in firm ground (never into the root ball). Where the wires touch the tree, they should be covered with rubber hose to prevent damage. Remove stakes as soon as roots become established. This can be as soon as a few months, so check your tree frequently. Stakes should not be left in place any longer than one growing season.
New Plant Care
All newly planted trees and shrubs need gentle care as they settle in to their new locations. To keep them healthy and encourage good initial growth…
- Water Properly
Plants should be slowly soaked to a depth of 4 inches, which is the equivalent of about an inch of water per week. This is necessary during the first year or two. Let the hose run slowly at the base of the plant until the water has penetrated to the root depth. Too much water can also be a problem. Feel the soil. If it is soggy or squishy, do not add water. Frequent light watering is not as good as a thorough soaking once per week, which will encourage strong root growth.
- Fertilize Appropriately
Your new plants should be given a Root Stimulator type fertilizer right after planting. You should not use a fertilizer meant for mature plants on new material, as it could cause damage to your plant. It is essential for new plants to develop a healthy root system – top growth will follow. After the first season, regular fertilizers can be used.
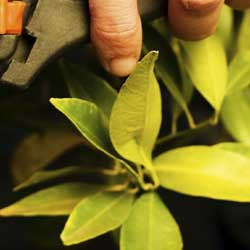
- Prune Safely
Pruning at planting time may be necessary for larger trees to reduce leaf surface to match cut roots. Remove one-third of smaller twigs. Do not cut back the main trunk or larger branches. If shaping is necessary, trim side branches enough to get uniformity.
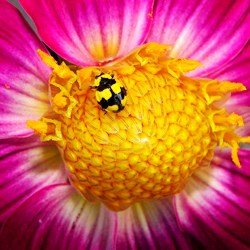
- Be Alert for Insects and Diseases
Keep an eye out for holes or brown leaves or needles. This could be a sign of insect or disease problems. Ask our staff for help identifying the insect or disease and to prescribe appropriate treatments.
- Special Care Plants
Some plants need extra special care because of their finicky needs. For example, azaleas, hollies, rhododendrons and dogwoods all need well-drained, acidic soils, high in organic matter and a shady location. Research the trees and shrubs you are planting to be sure you are meeting their needs right from the beginning.
It can seem intimidating to plant your own trees and shrubs, since they are an investment in your landscape that you hope to enjoy for many years. By understanding planting basics, however, you can easily give every plant a great start in its new home.