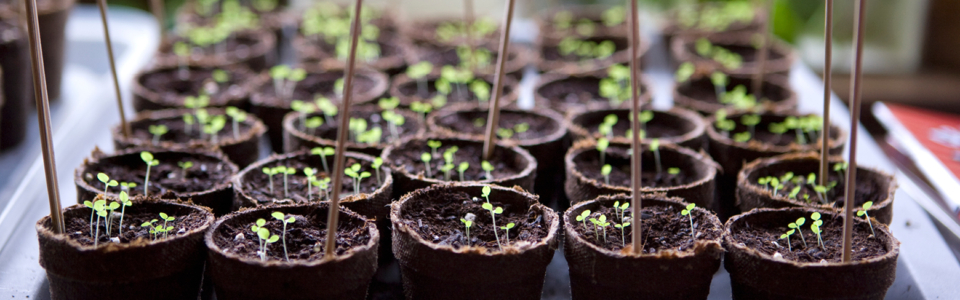
How does your winter landscape look from inside your home? Even if it’s bleak and uninteresting, it can be easy to renovate and redecorate – just treat it like your home! Perk it up by using your indoor decorating skills outdoors.
When you decorate your house, you make it interesting and inviting by hanging pictures on the walls, creating focal points with houseplants or statuary, adding color and displaying collections. A garden is no different. Texture, layers, colors, scents, sounds and movement all combine to create a wonderful space to enjoy when outside in the summer and from inside the house during the winter.
If the temperatures are low and the snow is deep you can’t plant right now, but these plants could go on your wish list in your gardening journal to enhance the view next winter. Here are some suggestions to get your dreaming started…
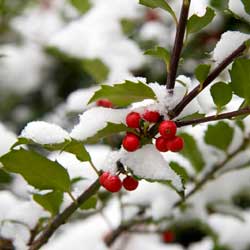
Colorful Berries
Not only can berries add an easy burst of color to the landscape no matter which direction you view it from, but they can attract winter wildlife as well. Winter berries may be black, white, red, orange, pink, purple, blue or golden. Popular options include…
- Hollies (Ilex spp.)
- Red Chokeberry (Aronia arbutifolia)
- Korean Barberry (Berberis koreana)
- Japanese Barberry (Berberis thunbergii)
- Florida Dogwood (Cornus florida)
- Cotoneaster varieties
- Creeping Wintergreen (Gaultheria procumbens)
- Heavenly Bamboo (Nandina domestica)
- Winter King Hawthorn (Crataegus viridis ‘Winter King’)
- Linden Viburnum (Viburnum dilatatum)
- European Cranberrybush (Viburnum opulus)
- Bayberry (Myrica pensylvanica)
- Crabapples (Malus spp.)
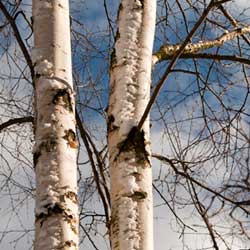
Ornamental Bark
Exfoliating, or peeling, barks may reveal underlying bark of the same or differing color. Patterned, ridged or furrowed bark offers visual interest, especially against snow. Consider…
- Paperbark Maple (Acer griseum)
- Striped Maple (Acer pensylvanicum)
- Arctic Fire Dogwood (Cornus stolonifera)
- Redosier Dogwood (Cornus sericea)
- American Hornbeam (Carpinus caroliniana)
- Cinnamon Clethra (Clethra acuminata)
- Paper Birch (Betula papyrifera)
- Yellow Birch (Betula alleghaniensis)
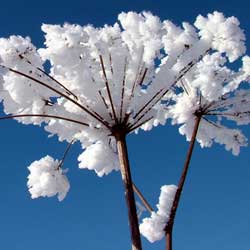
Seed Heads
Although we often deadhead plants as blossoms die, leaving a few to overwinter is a fabulous idea. Not only do they provide uniquely organic winter sculptural interest to the garden, but they also provide feed and protection for birds. Winter seed heads, when backlit by the low winter sun, really add pop in the landscape. Try leaving some seed heads on the following plants…
- Hydrangeas
- Roses
- Sedums such as Autumn Joy
- Rudbeckias
- Echinacea
- Astilbe
- Caryopteris
Unusual Branching
Especially beautiful when encased in ice, unusual branching patterns create natural focal points pulling the viewer’s vision through the winter garden. These plants prove a winter garden doesn’t need to be boring…
Twisting Growth:
- Harry Lauder’s Walking Stick (Corylus avellana ‘Contorta’)
- Curly Willow (Salix matsudana ‘Tortuosa’)
- Twisty Cryptomeria (Cryptomeria japonica ‘Rasen-Sugi’)
- Dwarf Twisty Baby Black Locust (Robinia pseudoacacia ‘Lacy Lady’)
- Contorted White Pine (Pinus strobus ‘Contorta’)
Weeping Shape:
- Weeping Cherry (Prunus subhirtella varieties)
- ‘Lavender Twist’ Weeping Redbud (Cersis canadensis ‘Covey’)
- Weeping Crabapples (Malus spp.)
- Maples (Acer spp.)
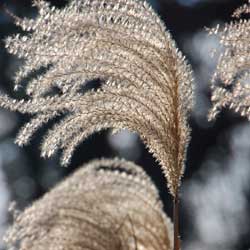
Ornamental Grasses
Nothing adds structure to the winter garden like ornamental grasses. Whether blowing in the breeze and adding movement or covered with reflective ice, grasses add texture, volume and the subtle colors of seed heads. Great options include…
- Silvergrass (Miscanthus spp.)
- Switchgrass (Panicum spp.)
- Northern Sea Oats (Chasmanthium)
- Karl Foerster Feather Reed Grass (Calamagrostis ‘Karl Foerster’)
- Fountaingrass (Pennisetum alopecuroides or P. setaceum ‘Purpureum’)
- Tufted Hairgrass (Deschampsia cespitosa)
- Pampas Grass (Cortaderia selloana ‘Pumila’)
Evergreens
No garden is complete without evergreens. Broadleaf evergreens and conifers establish the garden’s foundation. They anchor the beds when the perennials disappear, define boundaries and pathways and soften hard edges. Many broadleaf evergreens also provide summer flowers and fragrance.
Broadleaf Evergreens:
- Aucuba japonica
- Azalea and Rhododendron varieties
- Boxwood varieties
- Holly varieties
- Laurels
- Leucothue
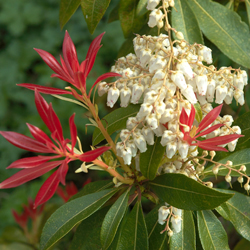
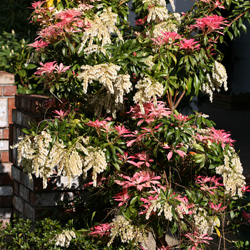
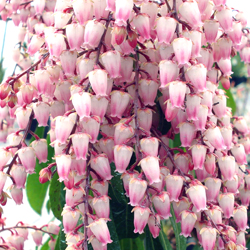
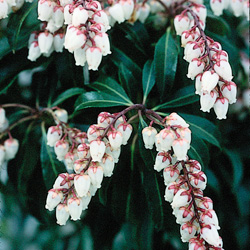
- Pieris varieties
- Skimmia
- Yucca
Conifers:
- Spruces such as Dwarf Alberta Spruce (Picea glauca var. albertiana ‘Conica’)
- Silver Korean Fir (Abies koreana ‘Horstmann’s Silberlocke’)
- Umbrella Pines such as Japanese Umbrella Pine (Sciadopitys verticillata)
- Junipers such as Blue Star Juniper (Juniperus squamata ‘Blue Star’)
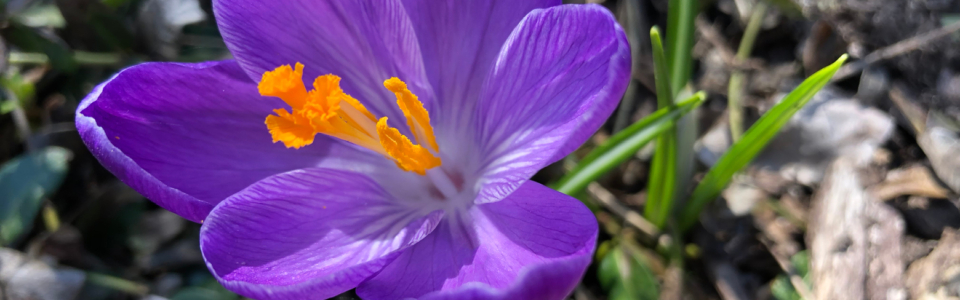
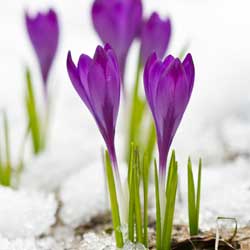
Bulbs
Several early bulbs emerge in the winter. Planted in the fall near entrances and along walkways, they offer their promise spring is just around the corner and can add a burst of color to the end of winter. Popular options include…
- Crocus varieties
- Yellow Danford Iris (Iris dandordiae)
- Snowdrops
- Blue Silberian Squills (Scilla)
- Snow Glories (Chionodoxa)
- Grape Hyacinth (Muscari)
- Hyacinths
Even though you can’t being planting now, you can begin planning, and perhaps even installing, non-plant garden features such as benches, yard art or lighting. LED lighting along pathways may be high on your list and we have the newest products to help your guests navigate to your doorway in any season. A bench, arbor or trellis adds structure and interest to the garden and will make a perfect meditation spot or reading nook when the weather warms up. You might want to plan a pond, the perfect spot for a fountain or even consider adding a sundial, fire pit or other unique feature to the yard. Whatever your garden dreams, we can help you achieve them, and you’ll never look out at your winter garden and wonder what could be again!